Just starred nvim-navic by SmiteshP. It’s an exciting project with a lot to offer. Simple winbar/statusline plugin that shows your current code context
Publishing rhythm
I came across winbar.nvim from fgheng, and it’s packed with great features and ideas. winbar config for neovim
Looking for inspiration? nvim-scrollbar by petertriho. Extensible Neovim Scrollbar
Looking for inspiration? nvim-hlslens by kevinhwang91. Hlsearch Lens for Neovim
I came across pre-commit from pre-commit, and it’s packed with great features and ideas. A framework for managing and maintaining multi-language pre-commit hooks.
I really like having global cli command installed with pipx. Since textual
0.2.x (the css release) is out I want to be able to pop into textual devtools
easily from anywhere.

Pipx Install #
You can pipx install textual.
pipx install textual
But if you try to run any textual cli commands you will run into a
ModuleNotFoundError, because you need to install the optional dev
dependencies.
Traceback (most recent call last):
  File "/home/u_walkews/.local/bin/textual", line 5, in <module>
    from textual.cli.cli import run
  File "/home/u_walkews/.local/pipx/venvs/textual/lib/python3.10/site-packages/textual/cli/cli.py", line 4, in <module>
    import click
ModuleNotFoundError: No module named 'click'
Pipx Inject #
In order to install optional dependencies with pipx you need to first install
the library, then inject in the optional dependencies using the square bracket
syntax.
pipx install textual
pipx inject textual 'textual[dev]'
I am working through the textual tutorial, and I want to put it in a proper cli
that I can pip install and run the command without textual run --dev app.py.
This is a fine pattern, but I also want this to work when I don’t have a file
to run.

pyproject.toml entrypoints #
I set up a new project running hatch new, and added the following entrypoint,
giving me a tutorial cli command to run.
...

[project.scripts]
tutorial = 'textual_tutorial.tui:tui'
https://waylonwalker.com/hatch-new-cli/
setup.py entrypoints #
If you are using setup.py, you can set up entrypoints in the setup command.
from setuptools import setup

setup(
    ...
    entry_points={
        "console_scripts": ["tutorial = textual_tutorial.tui:tui"],
    },
    ...
)
https://waylonwalker.com/minimal-python-package/
tui.py #
adding features
Now to get devtools through a cli without running through textual run --dev.
I pulled open the textual cli source code, and this is what it does at the time
of writing.
Note: I used sys.argv as a way to implement a
--devquickly tutorial. For a real project, I’d setup argparse, click, or typer.typeris my go to these days, unless I am really trying to limit dependencies, then the standard libraryargparsemight be what I go with.
def tui():

    from textual.features import parse_features
    import os
    import sys

    dev = "--dev" in sys.argv # this works, but putting it behind argparse, click, or typer would be much better

    features = set(parse_features(os.environ.get("TEXTUAL", "")))
    if dev:
        features.add("debug")
        features.add("devtools")

    os.environ["TEXTUAL"] = ",".join(sorted(features))
    app = StopwatchApp()
    app.run()


if __name__ == "__main__":
    tui()
Other Flags??? #
If you look at the source, there is one other flag for headless mode.
FEATURES: Final = {"devtools", "debug", "headless"}
Run it #
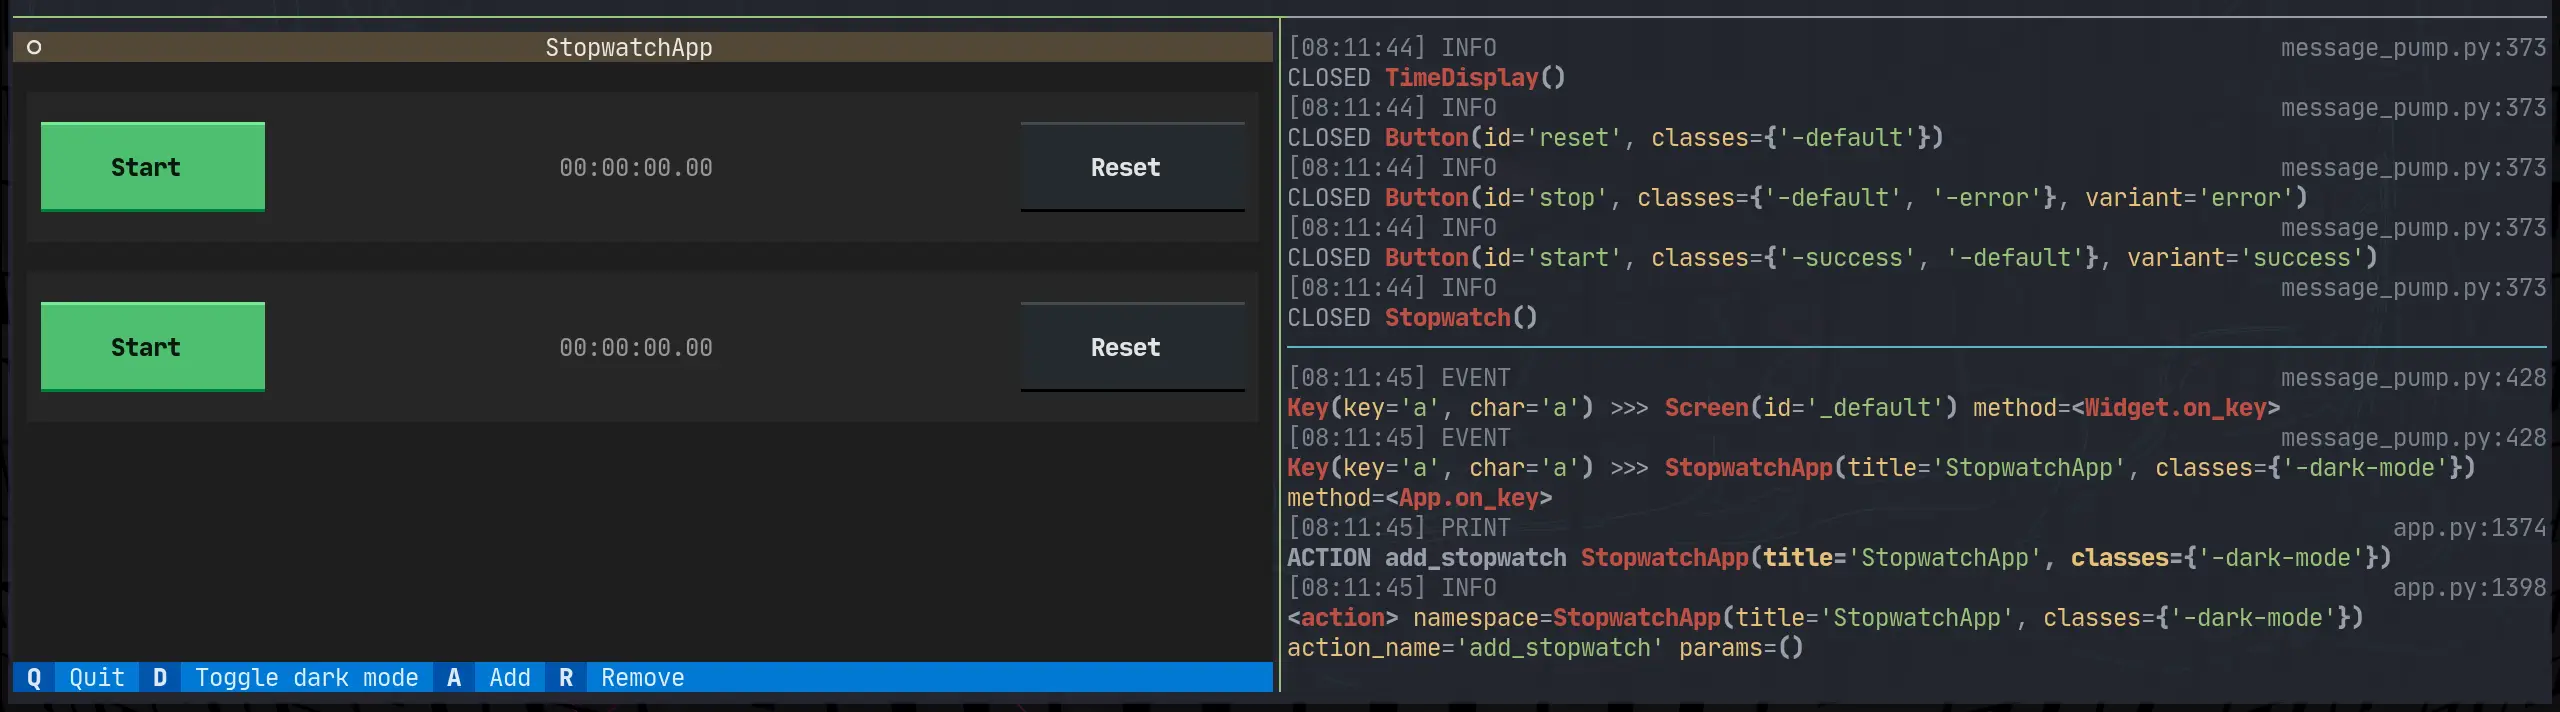
Here it is running with tutorial --dev on the left, and textual console on
the right.
I like AnH0ang’s project kedro-aim. A kedro plugin that enables logging to the ml experiment tracker aim
The work on PrismLauncher by PrismLauncher. A custom launcher for Minecraft that allows you to easily manage multiple installations of Minecraft at once (Fork of MultiMC)
I’m really excited about learn-cloudformation, an amazing project by widdix. It’s worth exploring! Learn how to use Infrastructure as Code on AWS with the help of CloudFormation.
For far too long I have had to fidget with v4l2oloopback after reboot. I’ve had this happen on ubuntu 18.04, 22.04, and arch.
After a reboot the start virtual camera button won’t work, It appears and is clickable, but never turns on. Until I run this command.
sudo modprobe v4l2loopback video_nr=10 card_label="OBS Video Source" exclusive_caps=1

Today I learned that you can turn on kernel modules through some files in /etc/modules...
This is what I did to my arch system to get it to work right after boot.
echo "v4l2loopback" | sudo tee /etc/modules-load.d/v4l2loopback.conf
echo "options v4l2loopback video_nr=10 card_label=\"OBS Video Source\" exclusive_caps=1" | sudo tee /etc/modprobe.d/v4l2loopback.conf
I ran into an issue where I was unable to ask localstack for its status. I would run the command and it would tell me that it didn’t have permission to read files from my own home directory. Let’s fix it
The issue #
I would run this to ask for the status.
localstack status
And get this error
PermissionError: [Errno 13] Permission denied: '/home/waylon/.cache/localstack/image_metadata'
What happened #
It dawned on me that the first time I ran localstack was straight docker, not the python cli. When docker runs it typically runs as root unless the Dockerfile sets up a user and group for it.

How to fix it #
If you have sudo access to the machine you are on you can recursively change
ownership to your user and group. I chose to just give myself ownership of my
whole ~/.cache directory you could choose a deeper directory if you want. I
feel pretty safe giving myself ownership to my own cache directory on my own
machine.
whoami
# waylon

chown -R waylon:waylon ~/.cache
Now it’s working #
Running localstack status now gives me a nice status message rather than an error.
❯ localstack status
┌─────────────────┬───────────────────────────────────────────────────────┐
│ Runtime version │ 1.2.1.dev                                             │
│ Docker image    │ tag: latest, id: dbbfe0ce0008, 📆 2022-10-15T00:51:03 │
│ Runtime status  │ ✖ stopped                                             │
└─────────────────┴───────────────────────────────────────────────────────┘
Markata now allows you to create jinja extensions that will be loaded right in
with nothing more than a pip install.
From the Changelog #
The entry for 0.5.0.dev2 from markata’s changelog
- Created entrypoint hook allowing for users to extend marka with jinja exensions #60 0.5.0.dev2

markata-gh #
The first example that you can use right now is markata-gh. It will render
repos by GitHub topic and user using the gh cli, which is available in github
actions!
Get it with a pip install
pip install markata-gh
Use it with some jinja in your markdown.
## Markata plugins

It uses the logged in uer by default.

{% gh_repo_list_topic "markata" %}

You can more explicitly grab your username, and a topic.
{% gh_repo_list_topic "waylonwalker", "personal-website" %}
How is this achieved #
The jinja extension details are for another post, but this is how markata-gh
exposes itslef as a jinja extension.
class GhRepoListTopic(Extension):
    tags = {"gh_repo_list_topic"}

    def __init__(self, environment):
        super().__init__(environment)

    def parse(self, parser):
        line_number = next(parser.stream).lineno
        try:
            args = parser.parse_tuple().items
        except AttributeError:
            raise AttributeError(
                "Invalid Syntax gh_repo_list_topic expects <username>, or <username>,<topic> both must have the comma"
            )

        return nodes.CallBlock(self.call_method("run", args), [], [], "").set_lineno(
            line_number
        )

    def run(self, username=None, topic=None, caller=None):
        "get's markdown to inject into post"
        return repo_md(username=username, topic=topic)

Entrypoints #
Then markata-gh exposes itself as an extension through entrypoints.
Creating entrypoints in pyproject.toml #
If your project is using pyproject.toml for packaging you can setup an
entrypoint as follows.
[project.entry-points."markata.jinja_md"]
markta_gh = "markata_gh.repo_list:GhRepoListTopic"
Creating entrypoints in setup.py #
If your project is using setup.py for packaging you can setup an
entrypoint as follows.
setup(
    ...
    entry_points={
        "markata.jinja_md": ["markta_gh" = "markata_gh.repo_list:GhRepoListTopic"]
    },
    ...
)

In my adventure to learn django, I want to be able to setup REST api’s to feed into dynamic front end sites. Potentially sites running react under the hood.

Install #
To get started lets open up a todo app that I created with django-admin startproject todo.
pip install djangorestframework
Install APP #
Now we need to declare rest_framwork as an INSTALLED_APP.
INSTALLED_APPS = [
    ...
    "rest_framework",
    ...
]
create the api app #
Next I will create all the files that I need to get the api running.
mkdir api
touch api/__init__.py api/serializers.py api/urls.py api/views.py

base/models.py #
I already have the following model from last time I was playing with django. It will suffice as it is not the focus of what I am learning for now.
Note the name of the model class is singular, this is becuase django will automatically pluralize it in places like the admin panel, and you would end up with Itemss.
from django.db import models

# Create your models here.

class Item(models.Model):
    name = models.CharField(max_length=200)
    created = models.DateTimeField(auto_now_add=True)

    def __str__(self):
        return f"{self.priority} {self.name}"
Next I will make some dummy data to be able to return. I popped open ipython
and made a few records.
from base.models import Item

Item.objects.create(name='first')
Item.objects.create(name='second')
Item.objects.create(name='third')
api/serializers.py #
Next we need to set up a serializer to seriaze and de-serialize data between
our model and json. You can specify each field individually or all of them by
passing in __all__.
from rest_framework import serializers

from base.models import Item


class ItemSerializer(serializers.ModelSerializer):
    class Meta:
        model = Item
        fields = '__all__'
api/views.py #

Now we need a view leveraging the djangorestframework. The serializer we
just created will be used to serialize all of the rows into a list of objects
that Response can handle.
Note: to return a collection of model objects we need to set many to
True
from rest_framework.decorators import api_view
from rest_framework.response import Response

from base.models import Item

from .serializers import ItemSerializer


@api_view(["GET"])
def get_data(request):
    items = Item.objects.all()
    serializer = ItemSerializer(items, many=True)
    return Response(serializer.data)

@api_view(['POST'])
def add_item(request):
    serializer = ItemSerializer(data = request.data)
    if serializer.is_valid():
        serializer.save()
    return Response()
api/urls.py #

Now we need to setup routing to access the views through an url.
from django.urls import path

from . import views

urlpatterns = [
        path('', views.get_data),
        path('add/', views.add_item),
        ]
todo/urls.py #
Then we need to include these urls from our api in the urls specified by settings.ROOT_URLCONf
from django.urls import path

urlpatterns = [
    ...
    path("api/", include("api.urls")),
]
Run it #
python manage.py runserver
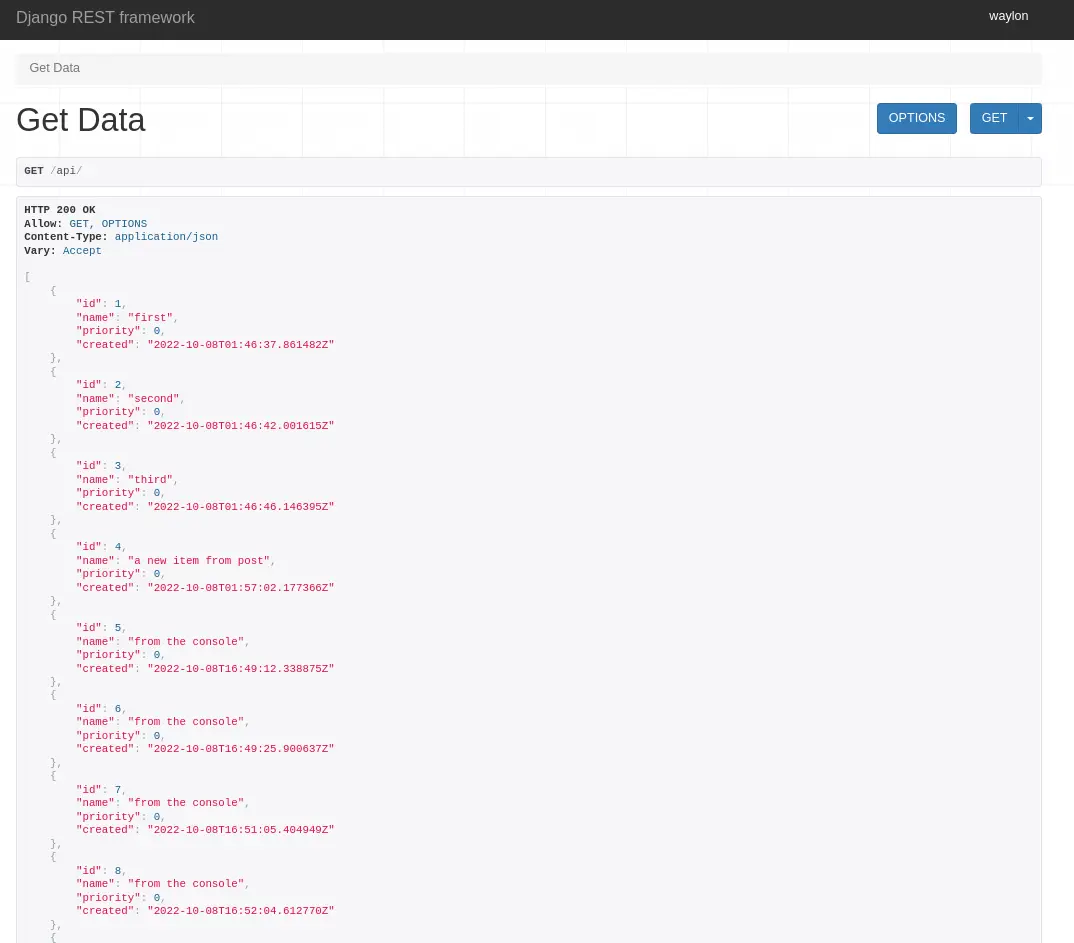
Running the developement server and going to localhost:8000/api we can see
the full list of items in th api.
I like openai’s project whisper. Robust Speech Recognition via Large-Scale Weak Supervision
Markata now uses hatch as its build backend, and version bumping tool.
setup.py, and setup.cfg are completely gone.

0.5.0 is big #
Markata 0.5.0 is now out, and it’s huge. Even though it’s the backend of this blog I don’t actually have that many posts directly about it. I’ve used it a bit for blog fuel in generic ways, like talking about pluggy and diskcache, but very little have I even mentioned it.
Over the last month I made a big push to get 0.5.0 out, which adds a whole
bunch of new configurability to markata.
Here’s the changelog entry.
- Moved to PEP 517 build #59 0.5.0.dev1
My Personal Simple CI/CD #
Before cutting all of my personal projects over to hatch. The first thing I did was to setup a solid github action, hatch-actionthat I can resue.
It automatically bumps versions, using pre-releases on all branches other than main, with special branches for bumping major, minor, patch, dev, alha, beta, and dev.
hatch new –init #
To convert the project over to hatch, and get rid of setup.py/setup.cfg, I ran
hatch new --init. This automatically grabs all the metadata for the project
and makes a pyproject.toml that has most of what I need.
hatch new --init
I then manually moved over my isort config, put flake8 config into .flake8,
and dropped setup.cfg.
lint-test #
Part of my hatch-action is to run a before-command, for markata, this runs
all of my linting and testing in one hatch script called lint-test. If this
fails CI will fail and I can read the report in the logs, make a fix and
re-publish.
[tool.hatch.envs.default.scripts]
cov = "pytest --cov-report=term-missing --cov-config=pyproject.toml --cov=markata --cov=tests"
no-cov = "cov --no-cov"
lint = "flake8 markata"
format = "black --check markata"
sort-imports = "isort markata"
build-docs = "markata build"
lint-test = [
 "lint",
 "format",
 "seed-isort-config",
 "sort-imports",
 "cov",
]
test-lint = "lint-test"
Typical branching workflow #
with automatic versioning
My typical workflow is to work on features in their own branch where they do
not automatically version or publish, they keep the same version they were
branched off of. Then I do a pr to develop, which will do a minor,dev bump
and publish a pre-relese to pypi.
# starting with version 0.0.0
Feature1 -- │
Feature2 -- ├── dev 0.1.0.dev1,2,3 ── main 0.1.0
Feature3 -- │
I will let several features collect in develop before cutting a full relese over to main. This gives me time to make sure the solution is what makes the most sense, I try to use it in a few projects, and generally its edges show, and another pr is warranted to make the feature useful for more use cases. After running and using these new releases in a few projects, I am confident that its ready and release to main.
managing prs #
Doing PR’s with gh, probably deserves its own post but here are some helpful commands.
gh pr create --base develop --fill
gh pr edit
gh pr diff | dunk
gh pr merge -ds
Building and publishing #

hatch makes building and publishing pretty straightforward. It’s one command inside my hatch-action to build and one to publish. On each project that uses my hatch-action I only need to give it a token that I get from PyPi.
env:
  HATCH_INDEX_USER: __token__
  HATCH_INDEX_AUTH: ${{ secrets.pypi_password }}
Full set of changes #
If you want to see all of the details on how markata moved over to hatch, you can check out this diff.
https://github.com/WaylonWalker/markata/compare/v0.4.0..v0.5.0.dev0

lkwq007 has done a fantastic job with stablediffusion-infinity. Highly recommend taking a look. Outpainting with Stable Diffusion on an infinite canvas
Check out toumorokoshi and their project deepmerge. A deep merging tool for Python core data structures
My next step into django made me realize that I do not have access to the admin panel, turns out that I need to create a cuper user first.

Run Migrations #
Right away when trying to setup the superuser I ran into this issue
django.db.utils.OperationalError: no such table: auth_user
Back to the tutorial
tells me that I need to run migrations to setup some tables for the
INSTALLED_APPS, django.contrib.admin being one of them.
python manage.py migrate
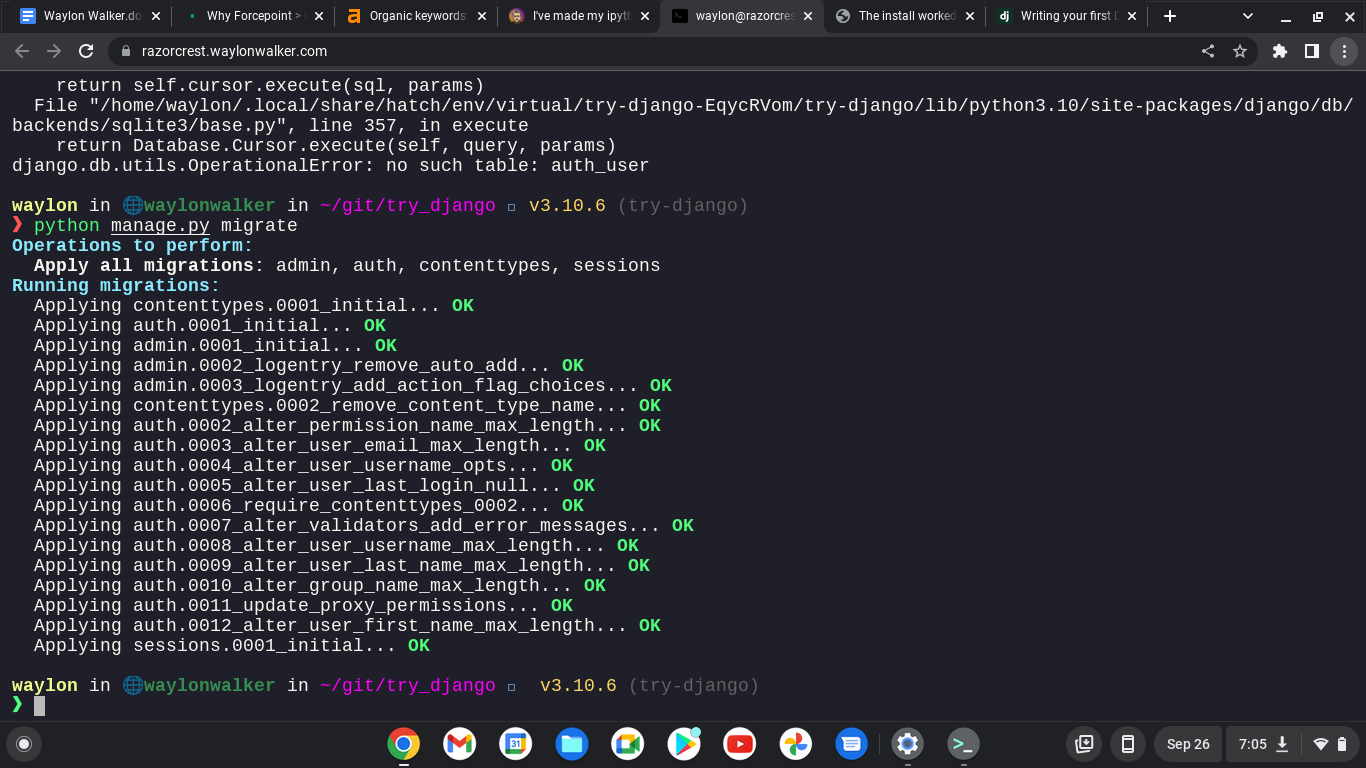
yes I am still running remote on from my chromebook.
python manage.py createsuperuser
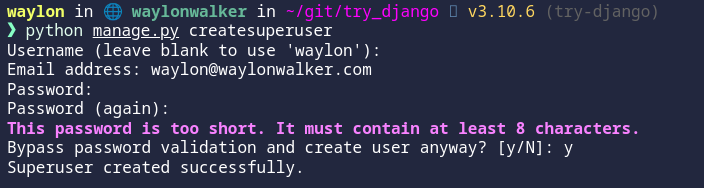
The super user has been created.

CSRF FAILURE #
My next issue trying to run off of a separate domain was a cross site request forgery error.
Since this is a valid domain that we are hosting the app from we need to tell
Django that this is safe. We can do this again in the settings.py, but this
time the variable we need is not there out of the box and we need to add it.
CSRF_TRUSTED_ORIGINS = ['https://localhost.waylonwalker.com']
I made it!! #
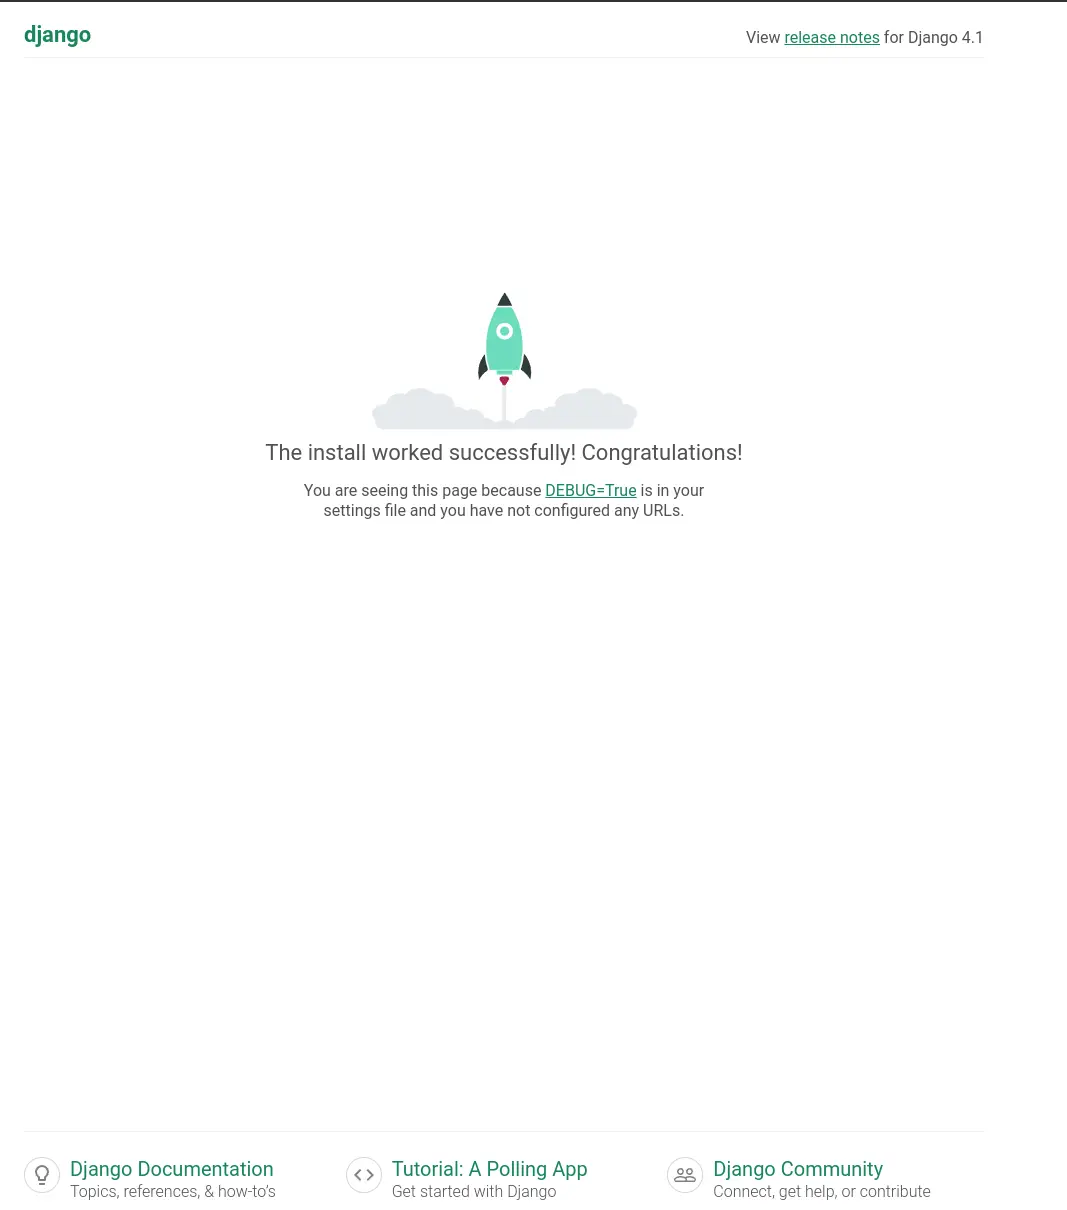
And we are in, and welcomed for the first time with this django admin panel.
Remote Hosting #
You might find these settings helpful as well if you are trying to run your site on a remote host like aws, digital ocean, linode, or any sort of cloud providor. I had it running in my home lab while I was out of the house and ssh’d in over with a chromebook.

I am continuing my journey into django, but today I am not at my workstation. I
am ssh’d in remotely from a chromebook. I am fully outside of my network, so I
can’t access it by localhost, or it’s ip. I do have cloudflared tunnel
installed and dns setup to a localhost.waylonwalker.com.
Settings #
I found this in settings.py and yolo, it worked first try. I am in from my
remote location, and even have auth taken care of thanks to cloudflare. I am
really hoping to learn how to setup my own auth with django as this is one of
the things that I could really use in my toolbelt.
ALLOWED_HOSTS = ['localhost.waylonwalker.com']